Color Grade
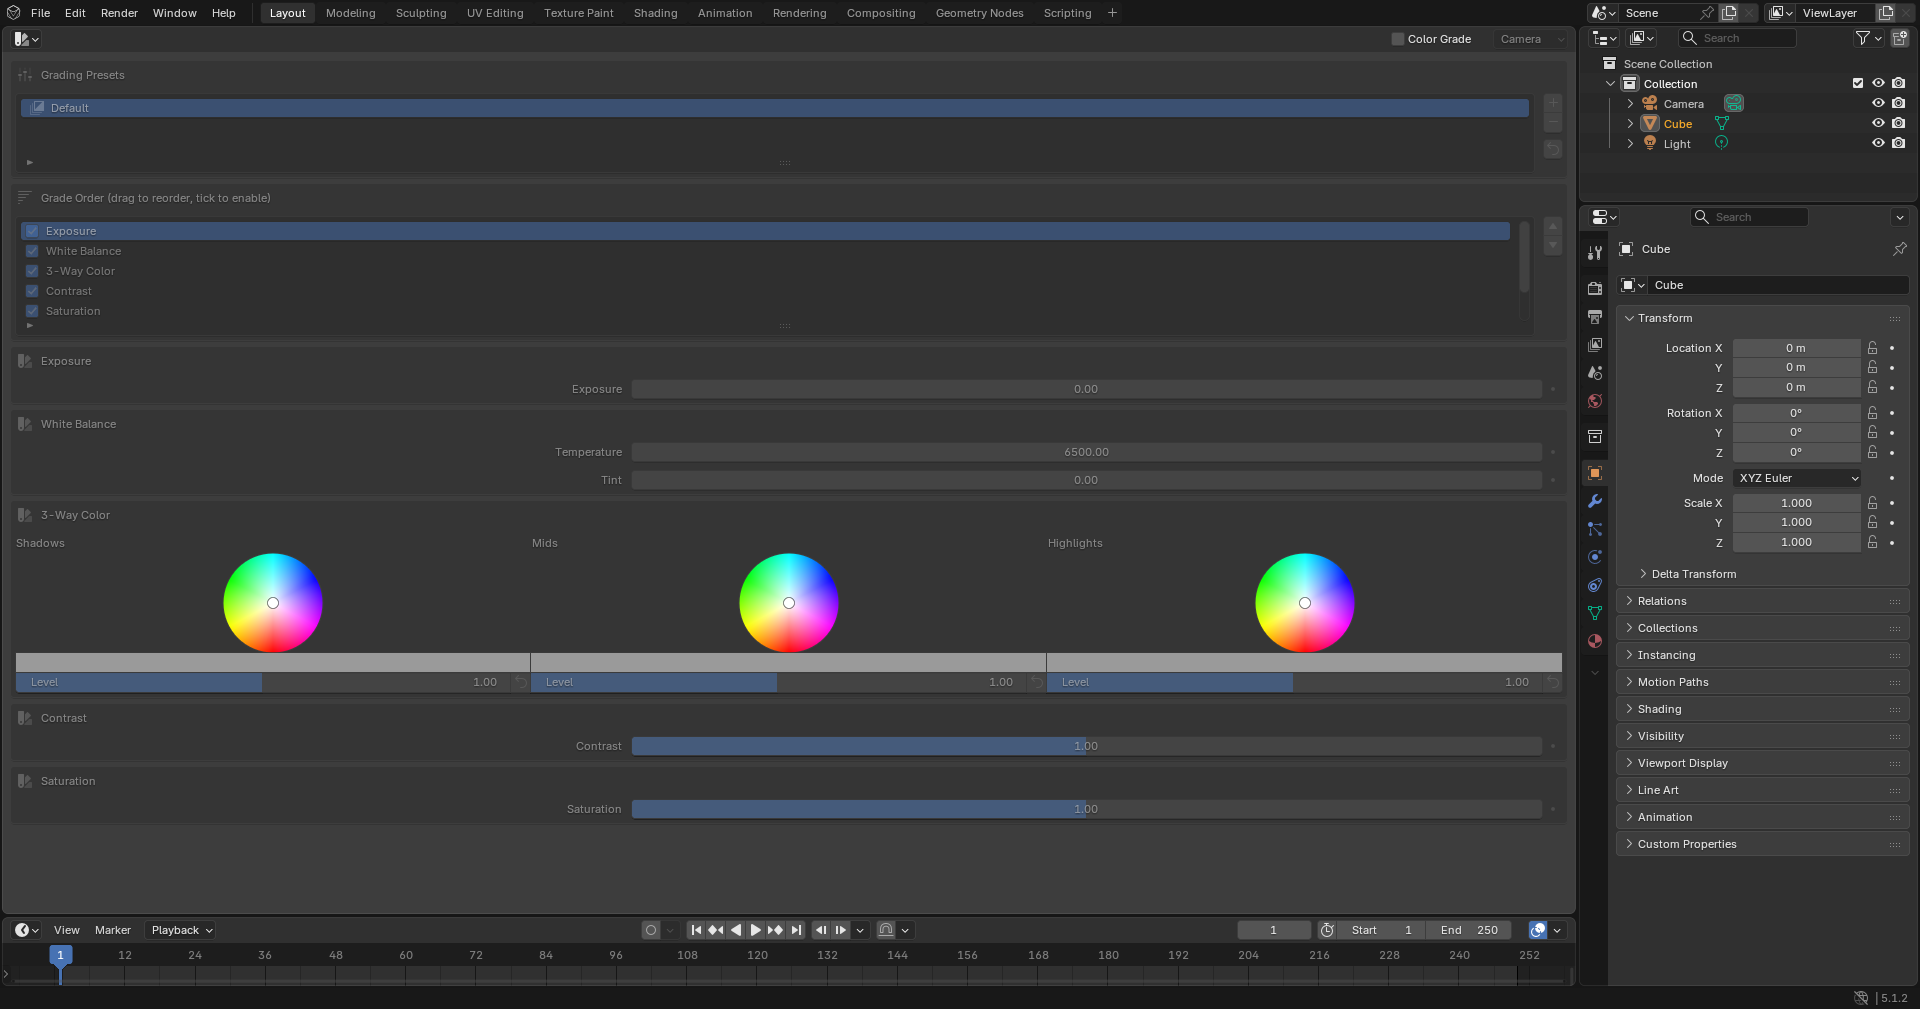
The Color Grade panel.
Color Grade is the dedicated grading editor of VIZid Suite. It builds a colour look from a stack of grade stages – exposure, white balance, colour wheels, contrast, saturation, curves and tonemap – which are applied live in the compositor over the rendered image. Each stage can be toggled on or off and reordered, and the whole look is saved as a named Grading preset that a render job can pick.
The grade is a block that runs ahead of the compositing effects (see Compositing / Post). It drives the viewport’s own compositor preview as well as the final render, so a look that reads right in the viewport renders the same way from the queue.
Color Grade runs in the dedicated Grade editor. In stock Blender it falls back to a Color Grade panel in the VIZid Gloss tab of the 3D Viewport sidebar (N).
Reference
- Editor:
Grade
- Panel:
Enabling the Grade
The grade is turned on and off by the Color Grade toggle. In the Grade editor it lives in the editor’s header bar; in stock Blender it is the tick in the Color Grade panel’s header. While off, the grade nodes are torn out of the compositor and the image passes through ungraded.
The viewport compositor preview (the Preview control, shared with the compositing editor) decides whether the grade is shown live in the 3D Viewport, on the active camera only or always.
Grading Presets
The Grading Presets list at the top of the panel holds the saved looks. Selecting a preset applies it immediately, and any later change to a stage or value is auto-saved back into the active preset, so editing is always live – there is no separate Save step.
There is always at least one preset; the first is named Default. New presets are auto-named Grading 1, Grading 2 and so on, and a preset can be renamed in place by double-clicking its name.
The buttons beside the list manage the presets:
- Add Preset
Adds a new preset from the current settings and makes it active.
- Delete Preset
Removes the active preset. At least one preset is always kept.
- Reset Preset
Resets every setting in the active preset to its default, including the curves and the default stage order.
Because presets are stored on the scene, they undo together with the settings
and travel inside the .blend file.
Grade Order
The Grade Order list sets which stages are active and the order in which they are applied. Each row has a tick to enable the stage and the stage name; the arrow buttons beside the list move the selected stage up or down.
Only enabled stages are drawn below the list, each in its own box, in the order shown here – so reordering the list reorders both the controls and the underlying compositor chain.
Grade Stages
Each stage below corresponds to one row of the Grade Order list.
Exposure
- Exposure
Scales the overall image brightness in stops.
White Balance
A creative white balance applied as an RGB multiply.
- Temperature
Warms (lower) or cools (higher) the image around a neutral 6500 K.
- Tint
Shifts the image green (negative) or magenta (positive).
3-Way Color
Three colour wheels driving a lift / gamma / gain colour balance – Shadows, Mids and Highlights. Each wheel has a colour picker for its hue tint, a swatch field, and a Level slider for its strength. The Reset Wheel button beside a wheel returns that wheel’s tint and level to neutral.
Contrast
- Contrast
Raises or lowers image contrast around mid grey.
Saturation
- Saturation
Scales overall colour saturation.
RGB Curves
A combined RGB curve for tonal and per-channel shaping. The curve is edited in the standard curve widget; the Reset Curves button returns it to a straight line. This stage is off by default.
The curve shape is stored with the preset, so it is captured and restored together with the rest of the grade.
Tonemap
A tonemap operator for compressing high-dynamic-range renders. This stage is off by default.
- Type
Photoreceptor or Simple.
- Intensity / Contrast / Light Adapt
The Photoreceptor controls.
- Key / Gamma
The Simple controls.
Using It with Rendering
A saved Grading preset is selectable per render job as the job’s Grading post look. In the VIZid Gloss render manager’s Post Look section, tick Grading and choose a preset; that grade is applied for that render only and the live viewport look is left untouched. Leaving the preset field blank renders the job under the current on-screen grade.