VIZid Lumi Studio
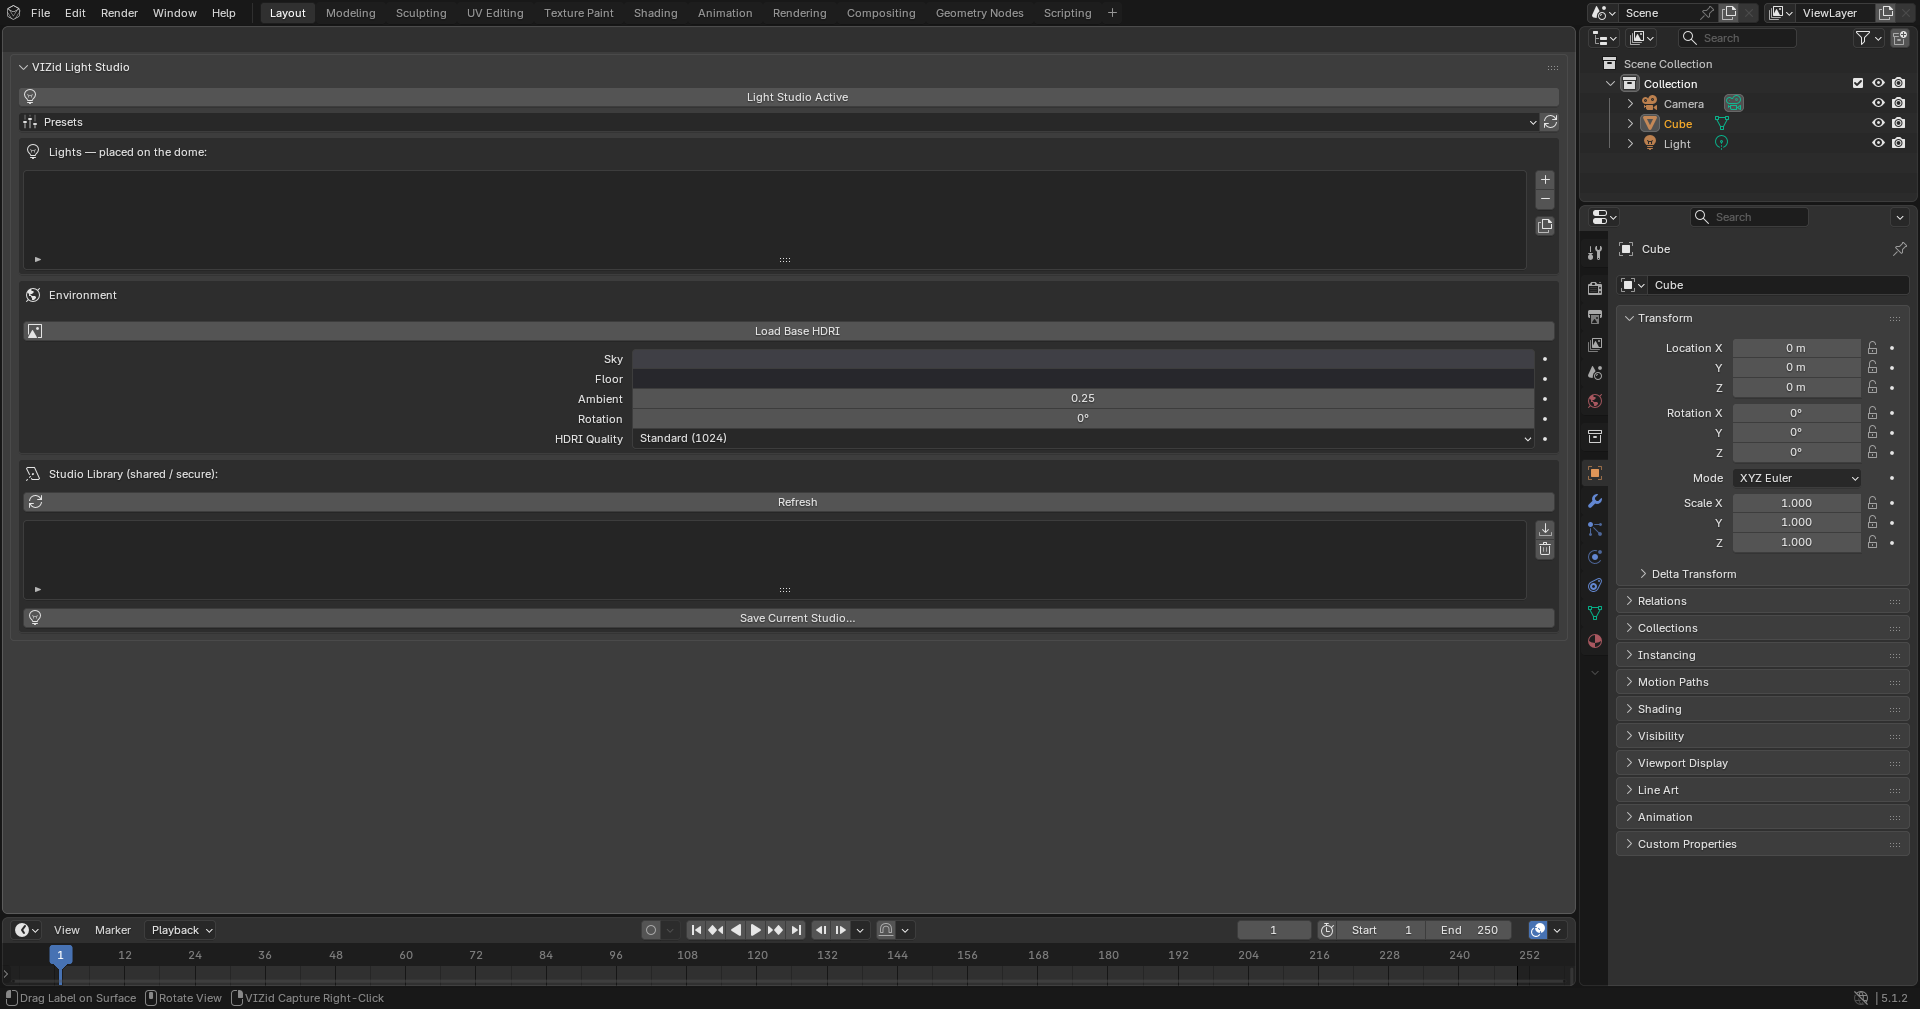
The VIZid Lumi Studio panel.
VIZid Lumi Studio is an interactive HDRI studio-lighting designer. Instead of loading a fixed environment map, lights are placed as pins on a virtual dome around the product and dragged into position while the lighting and reflections update live. The dome is baked to an equirectangular HDRI procedurally, so a setup is a tiny list of pins rather than a large image file, and can be saved to the secure library and shared like a material.
VIZid Lumi Studio drives the world lighting only; it does not touch the scene’s own lights or materials. The lighting it builds is what the VIZid Gloss render manager and the viewport both see.
VIZid Lumi Studio runs in the dedicated VIZid Lumi Studio editor. In stock Blender it falls back to a VIZid Lumi tab in the 3D Viewport sidebar (N).
Reference
- Editor:
VIZid Lumi Studio
- Panel:
Opening VIZid Lumi Studio
Open the VIZid Lumi Studio editor from the editor-type menu, or open the VIZid Lumi tab of the 3D Viewport sidebar.
The VIZid Lumi Studio Active toggle at the top of the panel turns the studio on. While active, VIZid Lumi Studio takes over the world and bakes a procedural HDRI from the current pins; turning it off simply stops re-baking. The last-baked studio world is left in place rather than swapped back to a previous environment, so if the world still shows the studio environment after switching VIZid Lumi Studio off, replace it from Blender’s World properties.
The quickest way to a lit product is a preset: select the product in the 3D Viewport, open the Presets menu and pick a setup. Switch to rendered or material-preview shading to see the result.
Lights
The light list and per-light controls.
Each light is a pin on the dome, shown in the Lights list. A row holds an enable tick, the pin name (with a type icon) and its colour swatch.
The column of buttons beside the list manages the pins:
- Add Light
Adds a new light and selects it.
- Remove Light
Removes the selected light.
- Duplicate Light
Copies the selected light, offset slightly around the dome.
Every change re-bakes the HDRI live, so the viewport updates as pins are added, edited or removed. The Rebake HDRI button next to the Presets menu forces a fresh bake, for example after changing the HDRI quality.
Light Parameters
With a light selected, its parameters are shown below the list:
- Type
The shape of the light: Rect (a rectangular soft-box), Disc (a round soft-box) or Gradient (a horizontal band that sweeps the sky or floor).
- Intensity
The brightness of the light.
- Color
The colour of the light.
- Position Lon / Lat
Where the pin sits on the dome – Lon is the azimuth around the product and Lat the elevation above the horizon, both in degrees.
- Size W / H
The width and height of the light on the dome; larger lights are softer.
- Softness
The width of the edge falloff.
Painting and Aiming Lights
A selected light can be aimed directly in the 3D Viewport. Two modes sit above the parameters, and each enabled light also carries a draggable handle on the dome.
Reference
- Editor:
3D Viewport
- Operator:
- LightPaint
The signature tool. After pressing the button, click on the product where a highlight is wanted; the light is placed so its reflection lands exactly at that point. Moving the mouse drags the light live. Releasing the mouse, or Return / Numpad Enter, confirms; Esc or RMB cancels.
- Aim
Swings the selected light around the product on the dome as the mouse moves. Releasing the mouse, or Return / Numpad Enter, confirms; Esc or RMB cancels.
In the viewport, each enabled light shows a ring handle on the dome, coloured to match the light. Dragging a handle aims that light, which is the same as the Aim mode for that pin.
Environment
The Environment panel sets the base the lights sit on and the bake quality.
The base is a vertical gradient between the Sky colour at the zenith and the Floor colour at the horizon, scaled by the Ambient strength. Alternatively a real HDRI can be used as the base: Load Base HDRI loads an image file as the environment under the studio lights, with an HDRI Strength multiplier; the lights add on top. The clear button removes the base HDRI and returns to the procedural gradient.
Rotation spins the whole studio around the product, moving every pin and the base together.
HDRI Quality sets the resolution of the baked equirectangular HDRI. Four tiers are offered – Fast (512) for snappy editing, Standard (1024) (the default), High (2048) and Ultra (4096) for final renders. Higher resolutions sharpen reflections at the cost of bake time.
Presets
The Presets menu replaces the current lights with a ready-made studio setup:
- 3-Point Studio
A key, fill and rim arrangement.
- Soft-box Pair
Two large soft-boxes flanking the product.
- Ring / Product
An overhead ring with a soft front fill.
- Dramatic Single
A hard key with a cool edge light against a near-black base.
- White Sweep
A bright, high-key sweep.
A preset replaces all current lights and the base gradient, so it is a starting point to tweak rather than an addition to the existing setup.
Studio Library
The Studio Library box stores named studio setups in the secure VIZid library, where they can be shared with a team like materials and CMF Looks. A setup is the small list of pins and base settings, not a baked image.
- Refresh
Reloads the list of saved studios from the library.
- Save Current Studio
Saves the current lights and base under a name.
- Load Studio
Loads the selected studio into the scene, replacing the current setup.
- Delete Studio
Removes the selected studio from the library.
These actions need the running VIZid library service – the same secure store that holds materials and CMF Looks. If it is not reachable, they report Library service unavailable.
Using It with Rendering
Because VIZid Lumi Studio builds the world lighting, it is what the viewport and the VIZid Gloss render manager both render against. A studio that looks right in rendered shading renders the same way from the queue.
VIZid Lumi Studio works in both Cycles and EEVEE; reflections resolve most cleanly in Cycles. For final imagery, raise HDRI Quality before rendering so reflections stay sharp, and pair the studio with a saved camera from the Camera for a finished product shot.