Cosmos
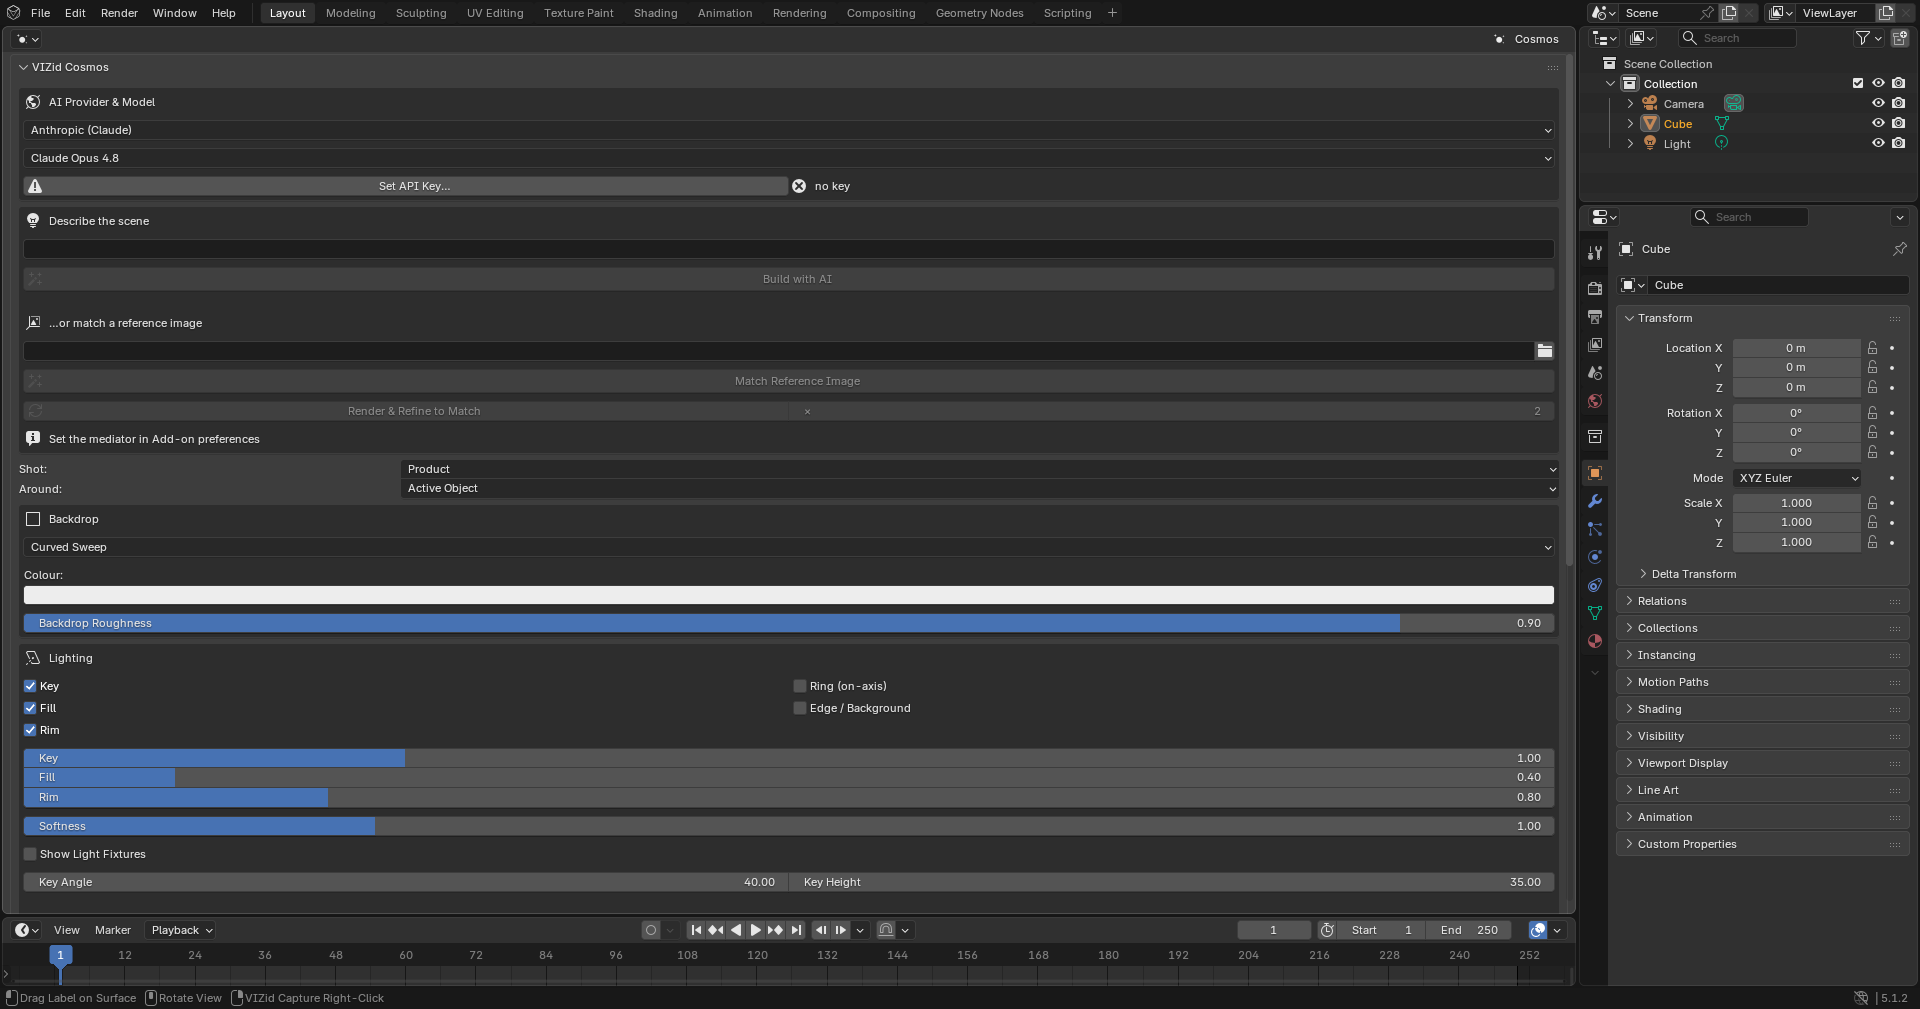
The VIZid Cosmos panel.
VIZid Cosmos is a packshot scene builder. It dresses the scene for product photography by creating a backdrop, a studio lighting rig, a camera and a world, either from manual controls, from a saved preset, or from a written description that an assisted-language model turns into a scene.
Everything Cosmos creates is placed inside a dedicated VIZid Cosmos collection, and nothing else in the scene is touched. The build is anchored to a subject (the active object, or the world origin) and scaled by a shot type, so a setup reads correctly at any size. Because only the VIZid Cosmos collection is built, the tool is non-destructive and can be re-run or cleared at any time.
Cosmos runs in the dedicated Cosmos editor. In stock Blender it falls back to a VIZid Cosmos tab in the 3D Viewport sidebar (N).
Reference
- Editor:
Cosmos
- Panel:
Opening Cosmos
Open the Cosmos editor from the editor-type menu, or open the VIZid Cosmos tab of the 3D Viewport sidebar.
To build around a particular object, select it first and leave Around set to Active Object; choose World Origin instead to build around the scene origin. After a build, the viewport switches to Rendered shading so the lighting is visible immediately (this can be turned off with Auto Rendered Preview in the add-on preferences).
Describe the Scene
The Describe the scene box drives Cosmos from a written description, for
example simple white studio sweep with softbox lighting. The
Build with AI operator sends the description to the bundled mediator,
which returns a scene and builds it. The build runs in the background; the
viewport stays responsive and Esc cancels.
This path needs the mediator executable and a configured model. The AI Provider
& Model box at the top of the panel selects the provider and model, and
Set API Key stores the key in the add-on preferences (never in the
.blend). When no mediator is found, the panel shows a hint and the AI
operators are disabled. Manual controls and presets work without a mediator.
Match a Reference Image
A reference photograph can be reproduced instead of a written description. Pick an image in the …or match a reference image field and press Match Reference Image; the model analyses the photograph’s lighting, camera and backdrop and builds a matching scene.
Render & Refine to Match then improves the match automatically. Each pass renders the current scene, compares it with the reference, adjusts the scene and rebuilds it. The × field sets how many passes to run; more passes give a closer match at the cost of more model calls.
When the model returns an explanation of what it did, it is shown in an AI analysis note below the operators.
Shot and Subject
Shot sets the canonical size of the subject, which scales the whole build – the backdrop extent, the light sizes and distances, and the camera distance:
- Macro
Jewellery or small parts, about 3 cm.
- Small Product
A phone or cosmetics, about 12 cm.
- Product
A shoe or bottle, about 30 cm.
- Medium Set
Furniture or luggage, about 1 m.
- Large Set
An appliance or e-bike, about 3 m.
Around chooses what the scene is built around – the Active Object (using its bounding box) or the World Origin.
Backdrop
The Backdrop box sets the surface behind and beneath the subject:
- Curved Sweep
A seamless floor that curves up into a back wall (a small-product sweep).
- Cyclorama Cove
An infinity studio cove with a seamless floor-to-wall fillet.
- Flat Wall
A floor and a separate vertical back wall.
- Gradient
A floor and a graduated back card.
- Solid / World Colour
No geometry; the world colour is the only background.
A Colour swatch tints the sweep, flat and solid backdrops. Backdrop Roughness controls the gloss of the floor and sweep – lower values make the floor glossier so the product reflects in it.
Lighting
The Lighting box assembles a studio rig from named roles. Each role has an enable toggle, and an intensity slider that appears while the role is on:
- Key
The main light.
- Fill
A softer light opposite the key that lifts the shadows.
- Rim
A back light that separates the subject from the backdrop.
- Ring (on-axis)
An on-axis ring light.
- Edge / Background
A light aimed past the subject at the backdrop.
Softness scales the size of every light, giving softer shadows. Key Angle and Key Height aim the key light around and above the subject. Show Light Fixtures builds visible softbox bodies at each light, so the studio gear itself can appear in the shot.
Below the lights, Ambient sets the strength of the world lighting, and HDRI loads an environment image for image-based lighting.
Camera & Render
The Camera & Render box sets up the camera and the render output:
- Lens (mm)
The camera focal length.
- Camera Height
The camera elevation in degrees, where 0 is eye level.
- Frame to Fit
Pulls the camera back so the active object fills the frame.
- Depth of Field / f-stop
Focuses on the subject; a lower f-stop blurs the background more.
- Exposure (EV)
The exposure of the render.
- Engine
The render engine: Default leaves the scene’s engine, or EEVEE or Cycles.
- Look
The colour-management view transform: Default, Standard, Filmic or AgX.
- Transparent Background
Renders with no background, for clipping paths or compositing.
- Shadow Catcher Floor
Adds a floor that catches only shadows, useful with a transparent background.
Building, Rebuilding and Clearing
The row of buttons at the bottom of the controls builds the scene from the settings above:
- Build Scene
Builds the backdrop, lights and camera from the current controls.
- Rebuild
Rebuilds the last scene, for example after changing the shot type.
- Clear Scene
Removes the VIZid Cosmos collection and everything in it.
Whenever a scene is built, the controls are updated to match it, so the panel always reflects what is in the scene, whether it came from the controls, a preset or the model.
Live Edit
Once a scene exists, the Live Edit box adjusts the build directly, with no model round-trip and an instant update:
- Exposure
The exposure of the built scene.
- Light Power
Scales the power of every light at once.
- Orbit / Dolly / Height
Move the camera around the look point, nearer or further from it, and up or down.
Presets and Saved Scenes
The Presets & Saved Scenes box reuses whole scenes. A scene – a backdrop, a lighting rig and a camera – is stored in one shared format, so presets and the user’s own saved scenes are interchangeable.
- Apply
Builds the selected preset or saved scene.
- Save
Saves the current scene under the entered name. Saved scenes are marked with an asterisk in the list.
- Delete
Removes the selected saved scene (only the user’s own scenes can be deleted).
Diagnostics
The Diagnostics box reports whether the mediator was found or is running, and Print SceneSpec to Console prints the last scene description, the mediator details and the built objects to the system console (). The Debug to Console toggle additionally prints the raw model reply during a build.