Strip Modifiers
Reference
- Panel:
Modifiers are used to make adjustments to the image, like contrast, brightness, saturation, color balance and applying masks.
You can add these modifiers directly to a media strip, or you can use them within an Adjustment Layer strip, making them apply to several media strips in one go.
Common Options
Each modifier provides several controls in its header:
- / Viewport
Toggles the modifier effect in the Preview region.
- / Render
Enables or disables the modifier during rendering and final output. This can be useful for comparing the strip with and without the modifier applied.
- Extras
- Duplicate Shift-D
Creates a duplicate of the modifier just below current one in the stack.
- Copy to Selected
Copies the modifier from the Active strip to all selected strips.
- Move to First/Last
Moves the modifier to the first or last position in the modifier stack.
- Show Node Group
For Compositor Modifiers, shows or hides the node group selector.
- Remove Strip Modifier
Removes the modifier from the modifier stack.
- Move Strip Modifier
Drag to reorder modifiers in the stack.
Modifiers are evaluated from top to bottom, so changing their order affects the final result.
Masking
You can mask each modifier to limit the area of the image it affects. This can be done using either a Mask or another strip.
- Mask Input Type
Type of input data used for the mask.
- Strip:
Use the grayscale representation of another strip’s image.
- Mask:
Use a Mask data-block.
- Mask
The Strip or Mask data-block to use.
- Mask Time Mask Input Only
How the start frame of the mask is calculated.
- Relative:
Mask animation is offset to the start of the strip.
- Absolute:
Mask animation is in sync with the scene frame.
Types
Currently, the following modifiers are supported:
Brightness/Contrast Modifier
Adjusts the brightness and contrast of the image.
Color Balance Modifier
Color balance adjustments, either by the Lift/Gamma/Gain or the Offset/Power/Slope method.
This modifier works similar to the Color Balance Node.
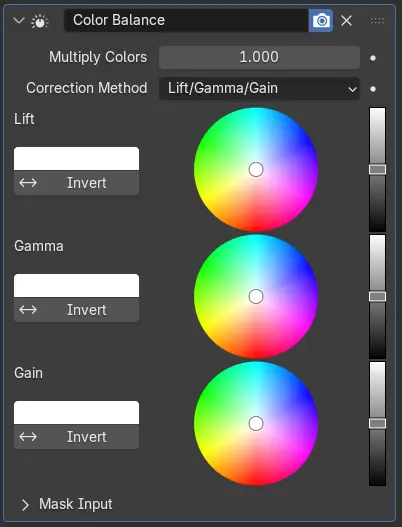
Depending on the selected method, the following operations can be applied to the color values in the sequencer color space:
- Lift/Gamma/Gain
- Lift
Increases the value of dark colors.
- Gamma
Adjusts midtones.
- Gain
Adjusts highlights.
- Offset/Power/Slope (ASC-CDL)
The following formula is applied to each RGB color value separately: \(c_{out} = (c_{in}×s + o)^p\)
- Slope
The multiplier \(s\) influences all color values except black. Its effect is stronger the brighter the source color is.
- Offset
Shifts color values after applying Slope by adding the Offset \(o\) to them. Note that the selected value shown in the UI will be reduced by 1, so the default value of 1 means effectively no offset is applied.
- Power
Overall exponent \(p\), which mainly adjusts the midtones.
Compositor Modifier
Compositor modifier is powerful tool to create arbitrary effects. To use it, you need to open compositor editor and change node subtree to sequencer. Then you can add new node tree and use it for any strip. These node trees can be marked as asset and reused across multiple .blend files.
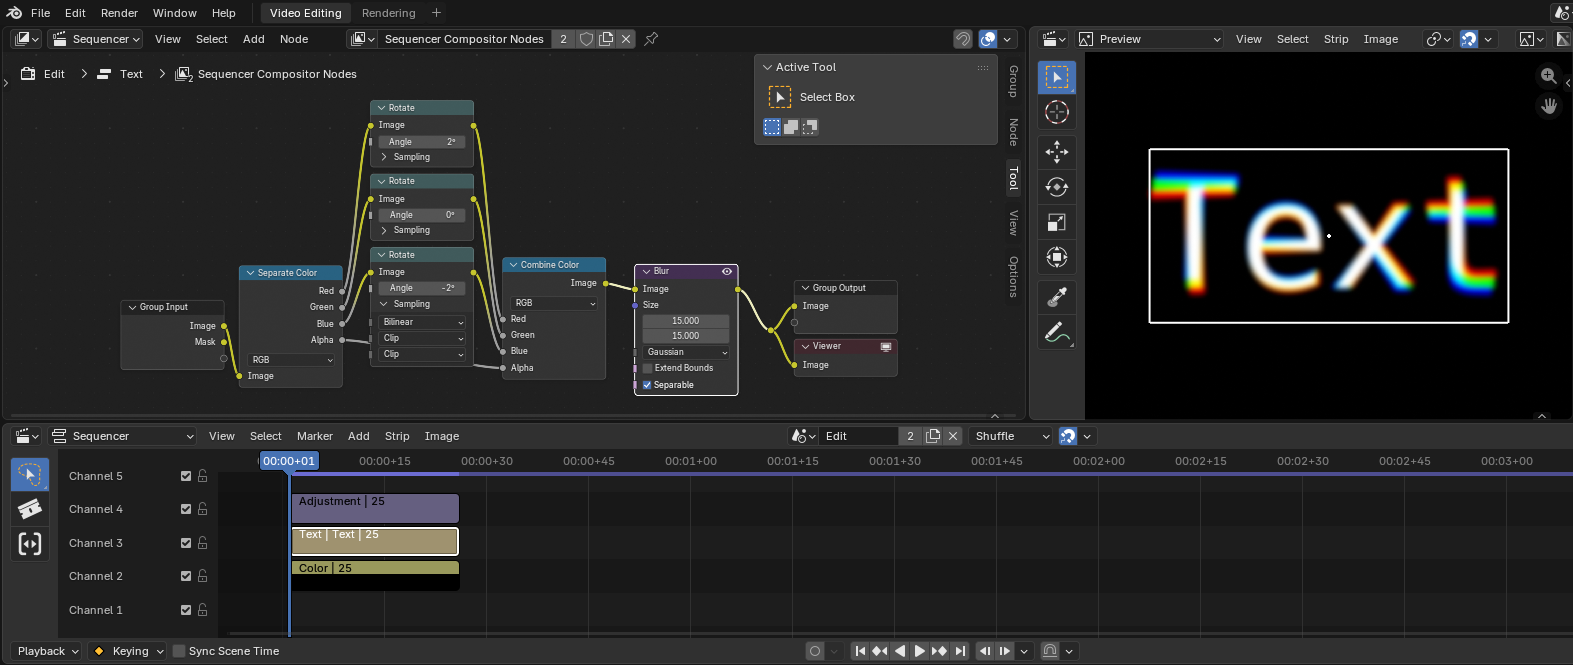
To learn more about how to use compositor, see Compositing
Options
- Node Group
The compositor node group used by the modifier.
The selector can be hidden by toggling Show Node Group.
Compatible node group inputs are automatically exposed as modifier properties, allowing effects to be adjusted directly from the Sequencer without opening the node editor.
Curves Modifier
Color and RGB curves.
This modifier works the same as the RGB Curves Node.
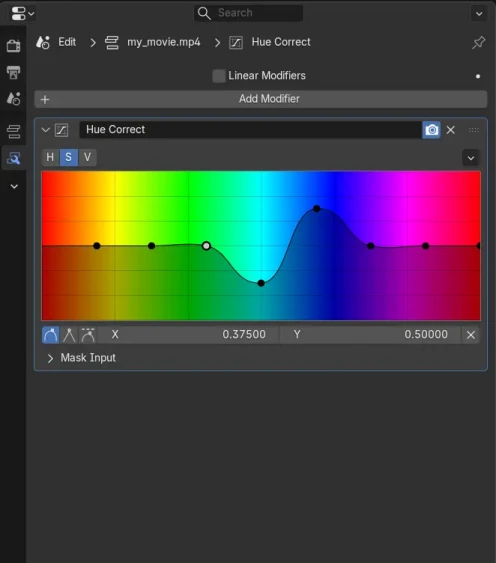
Hue Correct Modifier
HSV multi points curves.
This modifier works the same as the Hue Correct Node.
Mask Modifier
The mask modifier is used to affect the Alpha Channel of the current strip.
- Mask Input Type
Type of input data used for the mask.
- Strip:
Use the grayscale representation of another strip to affect the alpha of the current strip.
- Mask:
Use a mask data-block to affect the alpha of the current strip.
- Mask
The Strip or Mask data-block to use.
- Mask Time Mask Input Only
How the start frame of the mask is calculated.
- Relative:
Mask animation is offset to the start of the strip.
- Absolute:
Mask animation is in sync with the scene frame.
Tone Map Modifier
Used to map one set of colors to another in order to approximate the appearance of high dynamic range images in a medium that has a more limited dynamic range.
This modifier works the same as the Tone Map Node.
White Balance Modifier
Used to adjust the white balance by choosing the color that should be white.
Sound Equalizer Modifier
This modifier can be used to emphasize or suppress sound frequencies. The range is limited to 35Hz - 20kHz and +/-35dB.
Pitch
The Pitch modifier changes the pitch of a sound strip without altering its timing. It can be used to correct pitch, create voice effects, or match the key of other audio.
- Mode
Mode of the pitch shift.
- Semitones:
Shift pitch using musical intervals.
- Semitones
Number of semitones to shift the pitch. Positive values raise the pitch, negative values lower it.
- Cents
Fine adjustment in cents (1/100 of a semitone).
- Ratio:
Shift pitch using a direct multiplier.
- Ratio
Factor by which the audio pitch is scaled. Values greater than 1 raise the pitch, values less than 1 lower it.
- Preserve Vocal Formants
Preserve vocal formants when shifting pitch. This helps keep speech sounding more natural (for example, raising pitch without making the voice sound “chipmunk-like”), but may introduce additional processing artifacts depending on the audio.
- Quality
Quality of the pitch shifting.
- High:
Prioritize high-quality pitch processing, typically at the cost of performance. Best for final renders.
- Fast:
Prioritize speed over audio quality. Useful for editing and preview playback.
- Consistent:
Prioritize stability when pitch changes dynamically over time (for example, when animated). This can reduce sudden changes in processing quality, at the cost of additional artifacts in some cases.
Echo
The Echo modifier adds delayed repetitions of the sound, creating an echo effect. It can be used to simulate reflections, add depth, or create rhythmic audio effects.
- Delay
Time between each echo repetition in seconds. Larger values increase the spacing between echoes, while smaller values create a tighter, more rapid echo effect.
- Feedback
Amount of the echoed signal that is fed back into the effect. Higher values produce more repetitions and a longer decay, while lower values result in fewer echoes.
- Mix
Balance between the original (dry) signal and the echoed (wet) signal. A value of 0 uses only the original sound, while a value of 1 outputs only the echoed signal.